Are you ready to unleash your inner musician? Discover the simplest instrument to make and bring your musical dreams to life! With this comprehensive guide, you’ll learn how to craft an instrument that is both easy to make and fun to play. Say goodbye to expensive instruments and hello to endless creativity. Whether you’re a beginner or a seasoned pro, this guide has something for everyone. Get ready to unleash your inner musician and create your own musical masterpiece!
Understanding the Basics of Making Simple Instruments
Types of Simple Instruments
There are three main categories of simple instruments: stringed instruments, wind instruments, and percussion instruments. Each category has its own unique characteristics and is made using different materials and techniques.
- Stringed Instruments
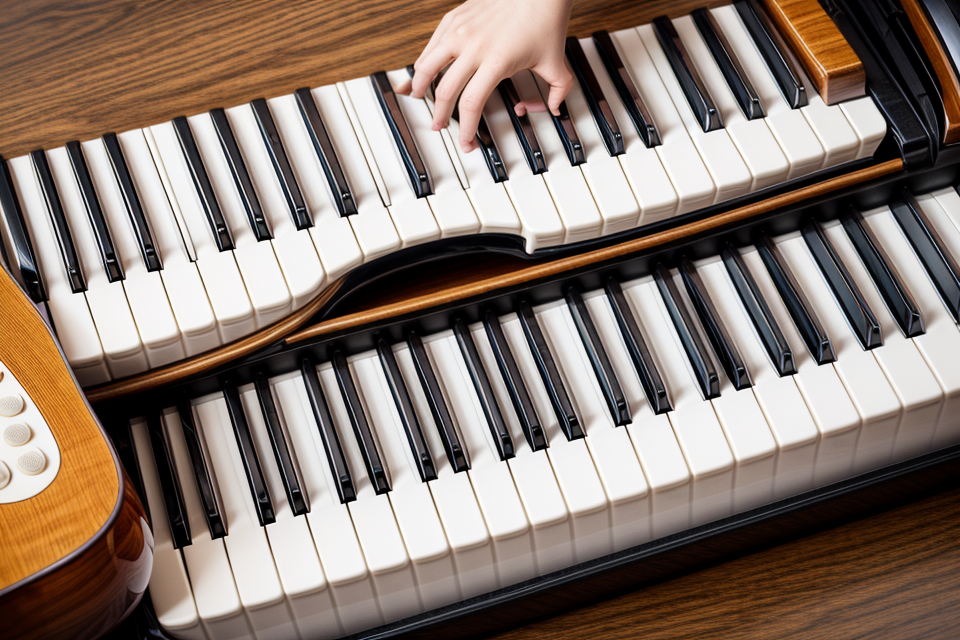
Stringed instruments are instruments that produce sound by vibrating strings. They include the guitar, violin, cello, and bass. These instruments are typically made from wood and have a hollow body that amplifies the sound of the strings. - Wind Instruments
Wind instruments produce sound by blowing air into a mouthpiece. They include the flute, clarinet, saxophone, and trumpet. These instruments are typically made from brass or wood and have a mouthpiece, reed, or valve that controls the airflow. - Percussion Instruments
Percussion instruments produce sound by being struck, shaken, or scraped. They include drums, cymbals, maracas, and tambourines. These instruments are typically made from wood, metal, or plastic and have a variety of shapes and sizes.
Each type of simple instrument has its own unique construction techniques and materials, and making them requires a certain level of skill and craftsmanship. In the following sections, we will explore the specifics of making each type of instrument.
Factors to Consider When Choosing a Simple Instrument to Make
When it comes to making simple instruments, there are several factors to consider before making a decision. Here are some of the most important factors to keep in mind:
- Skill level
- Availability of materials
- Time and resources
Skill level
One of the most important factors to consider when choosing a simple instrument to make is your skill level. If you are a beginner, it is important to choose an instrument that is easy to make and requires minimal skills. Some simple instruments that are perfect for beginners include the harmonica, kazoo, and tin whistle.
Availability of materials
Another important factor to consider is the availability of materials. Some instruments require specialized materials that may be difficult to find or expensive to purchase. Before making your decision, make sure you have access to the necessary materials.
Time and resources
Finally, you should consider the amount of time and resources you have available. Some instruments may require a significant amount of time and effort to make, while others can be made quickly and easily. Make sure you have enough time and resources to complete the project before you start.
In conclusion, choosing the right simple instrument to make depends on several factors, including your skill level, the availability of materials, and the amount of time and resources you have available. By considering these factors, you can make an informed decision and create a simple instrument that you can be proud of.
Benefits of Making Your Own Instrument
- Developing a deeper understanding of music
When you make your own instrument, you gain a deeper understanding of how sound is produced and how different materials affect the quality of the sound. This knowledge can be applied to other areas of music, such as selecting the right instrument for a particular piece of music or understanding the nuances of different playing techniques.
- Creating a unique and personalized instrument
Making your own instrument allows you to create a unique and personalized instrument that is tailored to your specific needs and preferences. You can choose the materials, shape, and size of the instrument to suit your playing style and desired sound. This level of customization is not possible when purchasing a store-bought instrument.
- Saving money compared to buying a store-bought instrument
Making your own instrument can be a cost-effective alternative to buying a store-bought instrument. Depending on the materials used and the complexity of the instrument, making your own instrument can be significantly less expensive than purchasing a similar instrument from a music store. Additionally, making your own instrument can be a fun and rewarding hobby that can save you money in the long run.
Selecting the Right Materials for Your Simple Instrument
Types of Materials
When it comes to crafting a simple instrument, the type of materials you choose will play a significant role in the final product’s quality and sound. Here are some common types of materials used in instrument making:
- Wood: Wood is a popular choice for making musical instruments due to its natural resonance and acoustic properties. Different types of wood have varying tonal qualities, and you can experiment with different woods to achieve the desired sound. Common woods used for instrument making include spruce, cedar, mahogany, and rosewood.
- Metal: Metal is another popular choice for instrument making, particularly for stringed instruments like guitars and violins. Metals like steel, brass, and aluminum can provide a bright and sharp sound, while copper and bronze can offer a warmer and mellower tone.
- Plastic: While not traditionally associated with musical instrument making, plastic can be a useful material for crafting simple instruments. Plastic is lightweight, durable, and relatively inexpensive, making it a great option for beginners or those on a budget. Some types of plastic, such as PVC pipe, can produce a surprisingly rich and resonant sound when used in the right way.
- Recycled materials: Instrument making can also be a great way to repurpose and recycle old or discarded materials. You can find creative ways to incorporate materials like old wood, metal scraps, or even discarded plastic bottles into your instrument design. Not only does this help reduce waste, but it can also result in unique and interesting sounds.
Tips for Choosing the Right Materials
When selecting materials for your simple instrument, it is important to consider the following tips:
- Consider the type of instrument you want to make: Different materials are better suited for different types of instruments. For example, wood is a great material for making stringed instruments, while metal is ideal for making wind instruments.
- Ensure the materials are safe and non-toxic: It is important to use materials that are safe and non-toxic, especially if you plan to use your instrument to create music for children or pets. Avoid using materials that can be harmful if ingested or inhaled.
- Source materials from local suppliers or recycle materials you already have on hand: Look for materials that are readily available in your area or consider recycling materials you already have on hand. This can help reduce your carbon footprint and save you money.
By following these tips, you can ensure that you select the right materials for your simple instrument and create a high-quality musical instrument that you can be proud of.
Gathering Tools and Equipment for Making Your Simple Instrument
Essential Tools
Measuring Tape
- A measuring tape is a basic tool that is essential for any DIY project. It is used to measure the length, width, and height of the instrument. It is important to have a tape measure that is accurate and easy to read.
Ruler
- A ruler is another basic tool that is essential for any DIY project. It is used to measure the length and width of the instrument. It is important to have a ruler that is accurate and easy to read.
Saw
- A saw is a tool that is used to cut the instrument’s components. There are different types of saws available, such as a handsaw, jigsaw, and circular saw. It is important to choose a saw that is appropriate for the instrument’s components and the skill level of the craftsman.
Sandpaper
- Sandpaper is a tool that is used to smooth the edges and surfaces of the instrument. It is available in different grits, such as 80, 120, and 220. It is important to choose the appropriate grit for the task at hand.
Drill
- A drill is a tool that is used to drill holes in the instrument’s components. It is available in different sizes and types, such as a cordless drill and a hammer drill. It is important to choose a drill that is appropriate for the task at hand.
Glue or Adhesive
- Glue or adhesive is a tool that is used to bond the instrument’s components together. There are different types of glue and adhesive available, such as wood glue, super glue, and epoxy. It is important to choose the appropriate glue or adhesive for the task at hand.
Additional Tools Based on the Type of Instrument
Creating a musical instrument requires a variety of tools and equipment. Depending on the type of instrument you want to make, there are specific tools that you will need to gather before you start crafting. In this section, we will discuss the additional tools that you will need based on the type of instrument you want to make.
Stringed Instruments
- Pliers: Pliers are essential for cutting, bending, and shaping wire. You will need a pair of pliers for every wire you will be using in your instrument.
- Wire cutters: Wire cutters are used to cut the wire to the desired length. They are essential for making the strings of your instrument.
- Tuning keys: Tuning keys are used to adjust the tension of the strings. You will need a set of tuning keys to make sure your instrument stays in tune.
Wind Instruments
- File: A file is used to shape and smooth the mouthpiece of the instrument. It is essential for creating a proper seal between the reed and the mouthpiece.
- Pipe cleaner: A pipe cleaner is used to clean the inside of the instrument. It helps to remove any debris or moisture that may affect the sound quality of your instrument.
- Reed cutter: A reed cutter is used to cut the reed to the correct size. It is essential for creating a proper seal between the reed and the mouthpiece.
Percussion Instruments
- Drumsticks: Drumsticks are used to play percussion instruments such as drums and cymbals. You will need a pair of drumsticks for every drum or cymbal you will be using in your instrument.
- Mallets: Mallets are used to play percussion instruments such as marimbas and xylophones. You will need a pair of mallets for every instrument you will be using in your ensemble.
In conclusion, the additional tools you will need for making your simple instrument depend on the type of instrument you want to create. Make sure to gather all the necessary tools before you start crafting to ensure that your instrument turns out perfect.
Beginning the Making Process
Step-by-Step Guide to Making a Simple Instrument
Stringed Instruments
Making a stringed instrument is a rewarding and enjoyable experience for those who enjoy crafting and music. The process can be broken down into several simple steps:
- Choose the type of instrument you want to make: Decide whether you want to make a guitar, violin, banjo, or another type of stringed instrument. Consider the materials and tools you will need, as well as the difficulty level of the project.
- Cut and shape the body and neck: Cut the body and neck from the chosen wood, using a saw or other cutting tool. Shape the body and neck using sandpaper, a rasp, or other shaping tools. Follow the specific instructions for the type of instrument you are making.
- Attach the strings and tuning pegs: Attach the strings to the body and neck of the instrument using string posts or other attachment methods. Attach the tuning pegs to the headstock of the instrument, using screws or other fastening methods.
- Add any decorative details: Add any decorative details to the instrument, such as inlays, bindings, or engravings. This step is optional, but it can enhance the beauty and uniqueness of the instrument.
Wind Instruments
Making a wind instrument is a fun and rewarding experience for those who enjoy crafting and music. The process can be broken down into several simple steps:
- Choose the type of instrument you want to make: Decide whether you want to make a flute, recorder, harmonica, or another type of wind instrument. Consider the materials and tools you will need, as well as the difficulty level of the project.
- Cut and shape the body and mouthpiece: Cut the body and mouthpiece from the chosen material, using a saw or other cutting tool. Shape the body and mouthpiece using sandpaper, a rasp, or other shaping tools. Follow the specific instructions for the type of instrument you are making.
- Attach the reed or valve system: Attach the reed or valve system to the instrument, using glue or other fastening methods. Follow the specific instructions for the type of instrument you are making.
- Add any decorative details: Add any decorative details to the instrument, such as engravings or paint. This step is optional, but it can enhance the beauty and uniqueness of the instrument.
Percussion Instruments
Making a percussion instrument is a fun and rewarding experience for those who enjoy crafting and music. The process can be broken down into several simple steps:
- Choose the type of instrument you want to make: Decide whether you want to make a drum, maracas, tambourine, or another type of percussion instrument. Consider the materials and tools you will need, as well as the difficulty level of the project.
- Gather materials for the body and drumhead: Gather the materials you will need to make the body and drumhead of the instrument. This may include wood, metal, plastic, or other materials.
- Attach the drumsticks or mallets: Attach the drumsticks or mallets to the instrument, using glue or other fastening methods. Follow the specific instructions for the type of instrument you are making.
- Add any decorative details: Add any decorative details to the instrument, such as paint or stickers. This step is optional, but it can enhance the beauty and uniqueness of the instrument.
Finishing and Playing Your Simple Instrument
Assembling the Instrument
Assembling the instrument is the next step after gathering all the necessary parts. The first step is to put all the parts together. This may involve attaching the body to the neck, or attaching the strings to the body. The second step is to adjust the strings or reed system for proper tuning. This involves tightening or loosening the strings or adjusting the reed system to achieve the desired pitch. The third step is to test the instrument for any adjustments needed. This can be done by plucking the strings or blowing into the reed system and listening for any notes that are out of tune. It is important to be patient and take the time to properly assemble the instrument to ensure it plays well.
Enjoying Your Creation
Creating your own simple instrument is a rewarding experience, and there are many ways to enjoy your creation. Here are some ideas to help you make the most of your new instrument:
Practice playing your simple instrument
Once you’ve made your instrument, it’s important to spend some time practicing. This will help you get a feel for the instrument and develop your skills as a musician. You can practice playing a variety of songs, or even try composing your own music. The more you practice, the better you’ll become at playing your instrument.
Perform for friends and family
One of the best ways to enjoy your creation is to perform for others. You can invite friends and family over to your house to watch you play, or you can perform at a local event or music festival. This is a great way to show off your skills and share your love of music with others.
Share your creation on social media or in local music groups
Finally, you can share your creation with a wider audience by posting pictures and videos of yourself playing your instrument on social media. You can also join local music groups or forums and share your creation with other musicians. This is a great way to connect with other musicians and get feedback on your playing.
By following these tips, you can make the most of your new simple instrument and enjoy playing music for years to come.
Tips and Tricks for Making Simple Instruments
Making a simple instrument can be a fun and rewarding process, and with the right tips and tricks, you can create a beautiful and unique musical instrument. Here are some tips and tricks to help you get started:
- Experiment with different materials and designs: There are countless materials and designs you can use to make a simple instrument. Try experimenting with different woods, metals, plastics, and other materials to find the perfect combination for your instrument. Don’t be afraid to try new designs and shapes – this is your chance to be creative and unique!
- Learn from online tutorials and videos: There are many online resources available that can help you learn how to make a simple instrument. From instructional videos to step-by-step tutorials, you can find plenty of information to help you get started. Take advantage of these resources to learn new techniques and get inspiration for your own project.
- Join a maker community for support and inspiration: Making a simple instrument can be a solitary pursuit, but it doesn’t have to be. Joining a maker community can provide you with support, encouragement, and inspiration as you work on your project. Whether you join an online forum or a local maker group, you’ll have access to a community of like-minded individuals who can help you stay motivated and share their own experiences and tips.
- Be patient and take your time: Making a simple instrument is a rewarding process, but it can also be time-consuming. Don’t rush the process – take your time and enjoy the journey. Remember that making a simple instrument is about the process, not just the end result. Be patient and enjoy the process of creating something unique and beautiful.
By following these tips and tricks, you’ll be well on your way to making a beautiful and unique simple instrument. Whether you’re a seasoned maker or a beginner, these tips will help you create something special that you can be proud of.
FAQs
1. What is the simplest instrument to make?
There are many simple instruments that can be made with minimal materials, but one of the simplest is a hand-held drum made from a plastic container, such as a bucket or a water bottle. All you need is a knife or scissors to cut the container in half and some duct tape to secure the pieces together.
2. What kind of materials do I need to make a simple instrument?
To make a simple instrument, you will need a plastic container, such as a bucket or a water bottle, a knife or scissors, and duct tape. You may also need some additional materials, such as strings or a straw, depending on the type of instrument you want to make.
3. Can I make a musical instrument with household items?
Yes, there are many simple musical instruments that can be made using household items. For example, you can make a homemade drum using a plastic container, such as a bucket or a water bottle, and some duct tape. You can also make a simple flute using a straw and some tape.
4. How long does it take to make a simple instrument?
The amount of time it takes to make a simple instrument will depend on the type of instrument you want to make and your level of skill. In general, it should take less than an hour to make a simple instrument, such as a hand-held drum.
5. Are there any safety precautions I should take when making a musical instrument?
Yes, it is important to take safety precautions when making a musical instrument. Always use caution when handling sharp objects, such as knives or scissors, and make sure to follow all instructions carefully. Additionally, be sure to supervise children closely when they are making musical instruments to ensure their safety.

